Carving a Halloween Pumpkin Made Easy!
Every October, millions of people carve pumpkins to help decorate their homes and yards for Halloween. While carving a simple jack-o-lantern face can be very simple, more creative pumpkin faces can take some time, as well as planning. The following paragraphs will help you to carve the perfect pumpkin by using a wide variety of easy pumpkin carving techniques.
No matter which type of jack-o-lantern face you wish to accomplish, carving a pumpkin always starts with the same first step -- choosing a very good pumpkin. In addition, you should consider the size and shape of the pumpkin you select. You want to be sure your pumpkin will sit well on flat surfaces, without falling over, before you select it for purchase. In addition, you can check it for the beginning stages of rot by pulling on it's stem. If the stem is loose, or if it pulls free, it has already started to rot.
While small children are highly attracted to actively participating in the pumpkin carving process, it will go much smoother if the younger children are preoccupied with other activities. One good way to allow them to feel helpful is to put them in charge of removing most of the pumpkin's insides, or its pulp. Another good activity for the smaller children is to decorate smaller pumpkins with magic markers while you do the carving. Small gourds can also be decorated with markers by your younger children, and they make great decorations!
To making pumpkin carving a breeze, there are a few recommended tools you should have ready. While there are kits you can buy, most people already have all the supplies they will need on hand. These supplies are:
-
A large kitchen knife
-
A smaller paring knife
-
A big wooden spoon
-
A grease marker or dry-erase marker
-
A large bowl
-
A damp rag
-
An apron or smock
-
Old newspapers
If you have all of these supplies ready and at hand, you are ready to start the actual pumpkin carving process.
-
Cover your work area with old newspapers and put on your smock/apron.
-
Wipe the surface of your pumpkin with the damp rag until it is free of all dirt.
-
Use the marker to draw a circle around the stem of your pumpkin. When deciding on the size of your circle, consider that this will serve as your jack-o-lantern's lid.
-
Using the large kitchen knife, cut out the circle you just drew. If you hold your knife at a 45 degree angle, it is less likely the lid will fall down into the pumpkin when completely cut out.
-
After taking off the lid of the pumpkin, scrape away any of the pulp that may be hanging from it.
-
Remove the pulp inside of the pumpkin using the wooden spoon, or your hands and put it in the big bowl. Remember to scrape the bottom as flat as you can, so your light source is sure to remain upright while inside of your jack-o-lantern.
-
Sketch the desired face or design onto the front of your pumpkin with the dry-erase or grease markers. If you mess up, wipe the surface clean with the damp rag and try again.
-
Using the small paring knife, cut around the face or pattern you just drew.
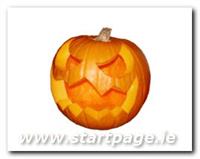
By following these simple steps, as well as taking heed to some of the advice provided, carving a halloweenpumpkin can be a very easy task. It is a common misconception that pumpkin carving is hard work. While jack 'o lantern carving can be difficult, it doesn't have to be.
author: Sheila King-Jeffcoat
See more on:
-
Halloween Articles